Revit: Down to the Details
A blog specifically tailored to sharing information about creating highly detailed parametric Revit Components.
Tuesday, October 9, 2012
Modeling using Images
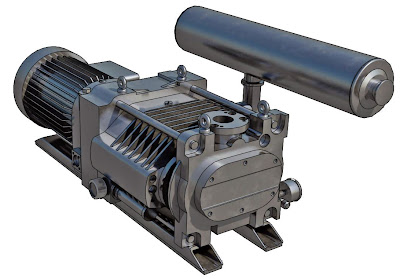
I created this sweet model this morning (about 3-4 hours of work)
While as a whole the model looks complex and very difficult to model, in reality it wasn't to hard to create
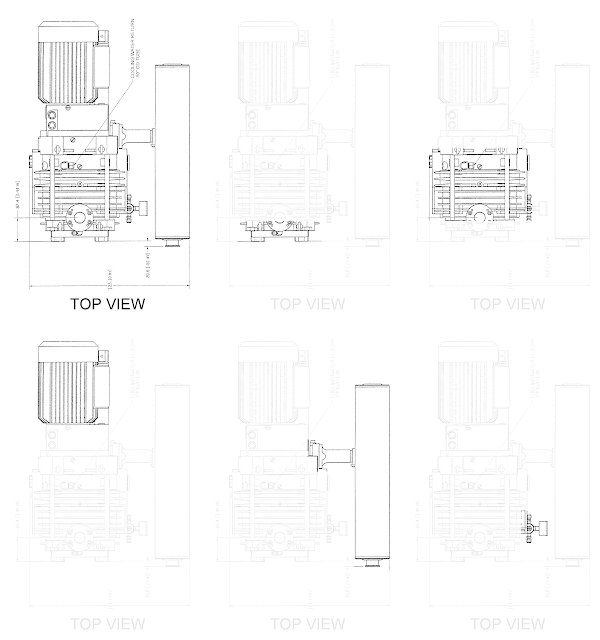
I started by opening a new generic model (face baced) family and setting out rough reference planes for overall length/width/height of the component. I then took the specification sheet for this piece of equipment and croped out the seperate views (Top, Front, and Right).
Then, by importing the images into Revit, and scaling them to the correct size I had lines that I could easily trace over to create my geometry.
When creating complex Revit models, it is best to take it one step at a time, instead of looking at the model as one big entity, think about breaking it up into pieces, it is much easier to digest that way.
For me, I like to model the really easy stuff first, and then start adding the smaller details later, or you could do it by segments, start from the front and work your way down.
This revit model consists of about 90% simple extrusions, with a few sweeps and revolves thrown in for good measure. (89 pieces total). I decided to forgo adding parameters, I figured that due to sucha specific request for this pump being able to change the dimensions would not be necessary.
Wednesday, September 19, 2012
Rendering with Lumion
Sorry about the lack of posts lately, I have been pretty swamped, and haven't really found the time,
Recently I have been utilizing a third party program known as Lumion to do a lot of my renderings. Lumion is in my opinion very easy to use and very fast as well. The program is a real time visualization software meaning you fly around in a rendered environment in real time.
For those interested ---> http://lumion3d.com/details/
Lumion is a rendering tool, meaning there is no modeling in the program itself, you import your Revit/Sketchup/3Ds Max/etc... model into Lumion then tweak the materials and set up the scene.
The program does come with some entourage to populate a scene such as vehicles, vegitation, and animated people, but the user should bring in at least 90% of the scene from their modeling program of choice.
Where Lumion really "shines" is in its exterior renderings, the program has a large variety of high quality vegitation (I always hated using the rpc trees Revit has to offer)
Here is an example of a project I recently worked on:
The revit file was created/rendered by a co-worker, she was upset with the quality of the rendering and asked if there was anything I could do, I then took the Revit model uploaded it to Lumion and replaced the RPC trees with the high quality 3D trees. Overall the process took maybe about 2 hours to replace all the trees and tweak the settings, but the rendering took about 20 seconds to export from the program.
Here is a file most people are familar with, the basic sample Revit project file:
I took the default file and exported it to Lumion and then tweaked the materials overall the process took less than 5 minutes.
Overall, the main focus of this post is not necessarily to praise Lumion, but more to share my experience with it and to inform that there are other programs available, and to not feel obligated to stick to Revit for rendering.
Recently I have been utilizing a third party program known as Lumion to do a lot of my renderings. Lumion is in my opinion very easy to use and very fast as well. The program is a real time visualization software meaning you fly around in a rendered environment in real time.
For those interested ---> http://lumion3d.com/details/
Lumion is a rendering tool, meaning there is no modeling in the program itself, you import your Revit/Sketchup/3Ds Max/etc... model into Lumion then tweak the materials and set up the scene.
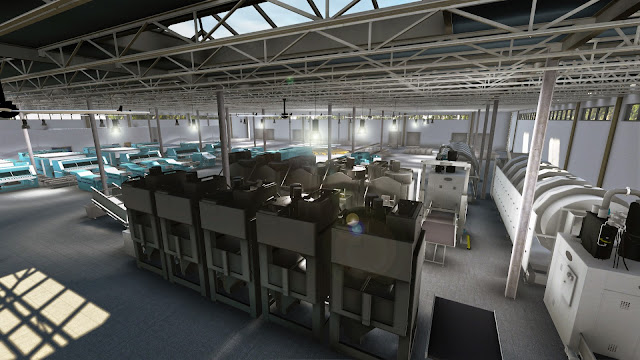.jpg) |
| Architecture: Revit, Equipment: 3Ds Max, Rendering: Lumion, Touch Up: Photoshop |
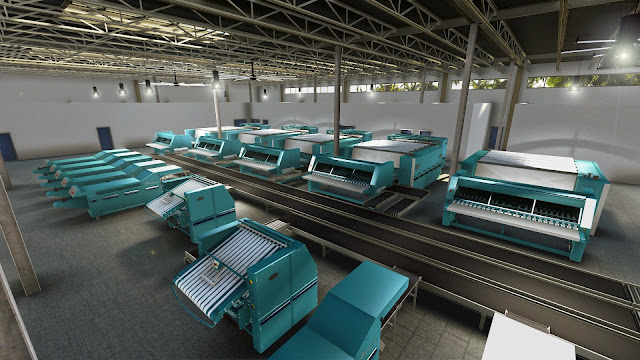.jpg) |
| Architecture: Revit, Equipment: 3Ds Max, Rendering: Lumion, Touch Up: Photoshop |
The program does come with some entourage to populate a scene such as vehicles, vegitation, and animated people, but the user should bring in at least 90% of the scene from their modeling program of choice.
Where Lumion really "shines" is in its exterior renderings, the program has a large variety of high quality vegitation (I always hated using the rpc trees Revit has to offer)
Here is an example of a project I recently worked on:
The revit file was created/rendered by a co-worker, she was upset with the quality of the rendering and asked if there was anything I could do, I then took the Revit model uploaded it to Lumion and replaced the RPC trees with the high quality 3D trees. Overall the process took maybe about 2 hours to replace all the trees and tweak the settings, but the rendering took about 20 seconds to export from the program.
 |
| Revit Rendering: High Quality 300 DPI |
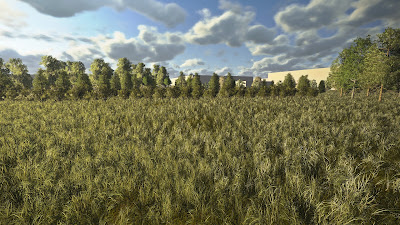+-+Final.jpg) |
| Lumion Rendering |
I took the default file and exported it to Lumion and then tweaked the materials overall the process took less than 5 minutes.
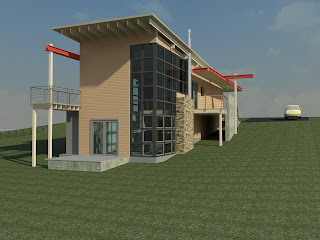 |
| Revit Rendering: High Quality 300 DPI - 16min |
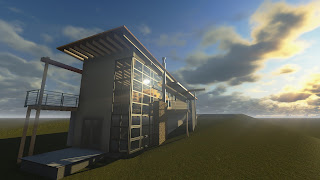 |
| Lumion Rendering: 5min setup - 5sec export |
 |
| Lumion also has fantastic water effects! |
Wednesday, August 22, 2012
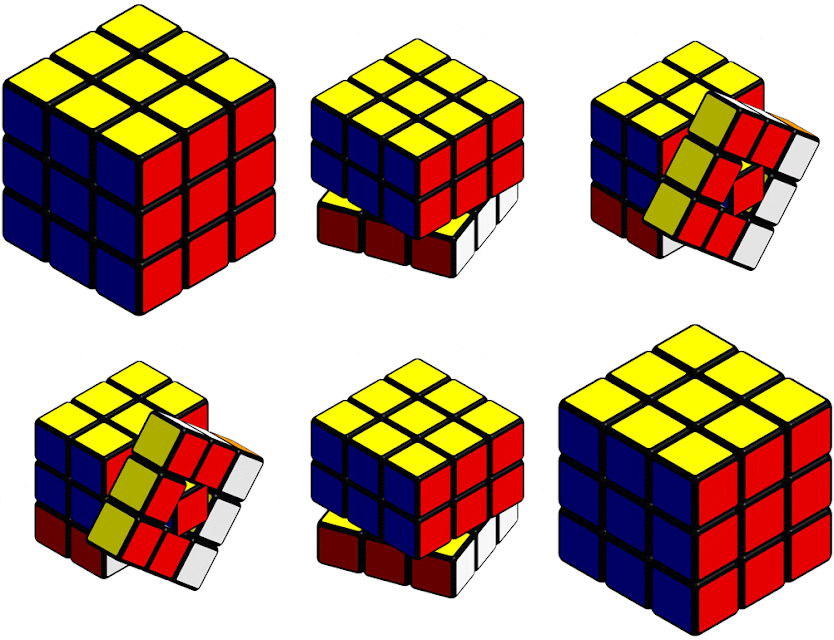
Rubik's Cube: Part 1
How many times have you thought to yourself "Man, I can't believe nobody has used Revit to model a workable Rubik's Cube, my building depends on it!"
Probably just as many times as you have thought "I wish I had some mustard for this ice cream sandwich"
Regardless, I did it anyways (while eating an ice cream sandwich covered in mustard note* not really)
Anyways, if you are not into Rubik's Cubes, but are interested in learning how to paramaterize the rotation of an object in all three directions than you may still be interested.
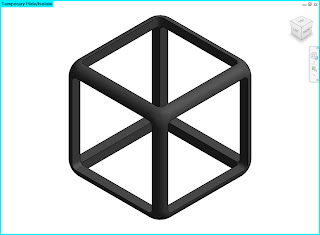
I started out by modeling a single cubelet of the Rubik's Cube and giving it the appropriate parameters to control its dimensions. Instead of using a simple square extrusion, I chose to use six sweeps (one for each side) and joined their geometry to create the rounded edges. I then filled in each segment with an extrusion, each with a different color.
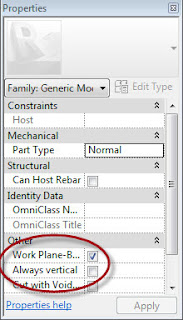
Now that the cubelete is finished it is time to give it the ability to move and rotate, to do this we must first make the component "work plane based" and turn off "always verticle" in the properties window (see below) then save as "Basic Cubelet". The process we will use to control the movement and rotation of the cubelet, is through the use of nesting the component multiple times each time adding a new movement. In the end the basic cubelet will be nested four times. (X,Y,Z movement, X rotation, Y rotation, and Z rotation) and linking the parameters between each level.
Next we create a new blank generic model and create a rig to control the movement of the cubelet in the x,y, and z directions. Now you may think to yourself "Well, thats easy just create a reference plane with a parameter to control the distance." While this may work in most cases, it doesn't work whe you need to input a negative value. For that, we need to get a little bit fancy...
I got the method I used from here ---> http://dorevit.blogspot.com/2008/01/offsets-for-families.html
I first created 2 reference planes, one on each side of the centerline I then gave a dimension from the centerline to the right most reference plane and a dimension from the leftmost to the right most (see below)
I then created a new distance parameter called "X" and used formulas to control "Xpos" and "Xneg" (see above) This allows the user to input a positive or negative value and the cublet will move accordingly. I repeated this process for both the "Y" and "Z" directions and the locked the cubelet to the reference planes.
Now I can control my cubelte's location in all three directions! Hazah!
Now its time for the rotation parameters, make the component "work plane based" and turn off "always verticle" in the properties window and save as "Basic Cubelet-move"and then create a new blank generic model family. Now we are going to make the rig to control the rotation in the "X" direction. To do this we are going to use the revolve method so we can have values of both 0º and 360º without the model breaking. For more info on this method go here:
or read my previous posts.
Once the rig is complete load in "Basic Cubelet-move" and host it to the approroate face. Now we need to link the parameters of the loaded family. To do this we click on the cublet and in the properties window click on the little square to create new parameters (see below)
Now it is time to rinse and repeat, make the component "work plane based" and turn off "always verticle" in the properties window and save as "Basic Cubelet-Xrot"and then create a new blank generic model family. Create a new rotation rig, this time for the "Y" direction using the same steps as before, save that and then finally create a new generic model family for the "Z" direction.
In the end your cubelet model should be five levels deep (Zrot-->Yrot-->Xrot-->Movement-->Basic)
Now it is time to put it all together by creating a new generic model and loading in the Cubelet.
Place the first cube in the center then create a new copy and place it in the same location, then use the X,Y,and Z movement parametrs to put it in the right location (this allows the cubes to rotate around the same center point)
Once all nine 27 cubes are placed you can select the cubes you want to rotate and ajust the rotation parameter to rotate them.
note* this is just Part 1 and comes with some limitations I plan on working on the model further
- The cubelets can only be rotated in the family environment
- The cubelet's rotation gets finicky when rotated multiple times resulting in the user needing to rotate each cubelet individually
For Part 2, I plan on automating the whole thing using many, many "If,Then" statements or possibly using something like dynamo (although I kind of would like to keep it all native to standard Revit). The end version will have the user inputs what side to turn instead of selecting the blocks individually, the end result will let the user "play" with the cube in the project environment and fix the rotation errors
There are probably me efficent ways to go about creating these sort of things so if you have any input don't be afraid to comment!
There are probably me efficent ways to go about creating these sort of things so if you have any input don't be afraid to comment!
If you want to check it out hands on you can download it here:
EDIT: Apparently it looks like the "Z" rotation is broken (I think I may have it oriented the same as the "Y" rotation, or I hosted the cubelet wrong), so i'll have to fix that eventually, regardless, you still might find it pretty neat to check out
Wednesday, August 8, 2012
Rotating Curtain Panel Revisted
Thanks to Andy over at http://www.grevity.blogspot.com/, he recommended that my rotating curtain wall system could be created using standard curtain wall opposed to pattern based which would make it simpler and easier to manipulate. So here is how to do it!
Start by creaing a custom Curtain Wall Panel
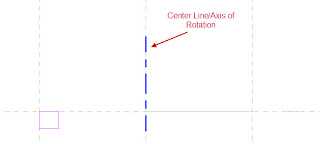
Go to the Exterior View and create a new Solid Revolve form, create a square with its axis line being the center of rotation for your panel, dimensioning the form is not necessary because we are only using it for its work plane (be sure to turn off the forms visibility)
Now it is time to create the parameters using the same methodology as my previous panel, we need to create an instance input value and an overall rotation value, however, we also need values to control our work plane that the extrusion will be hosted on.
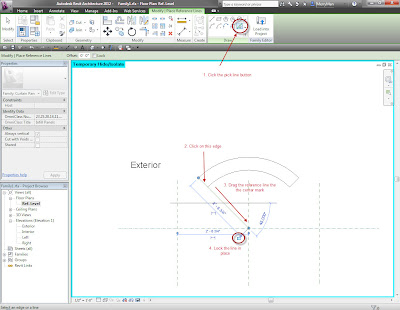
Next we create the workplane using a reference line and the pick line function
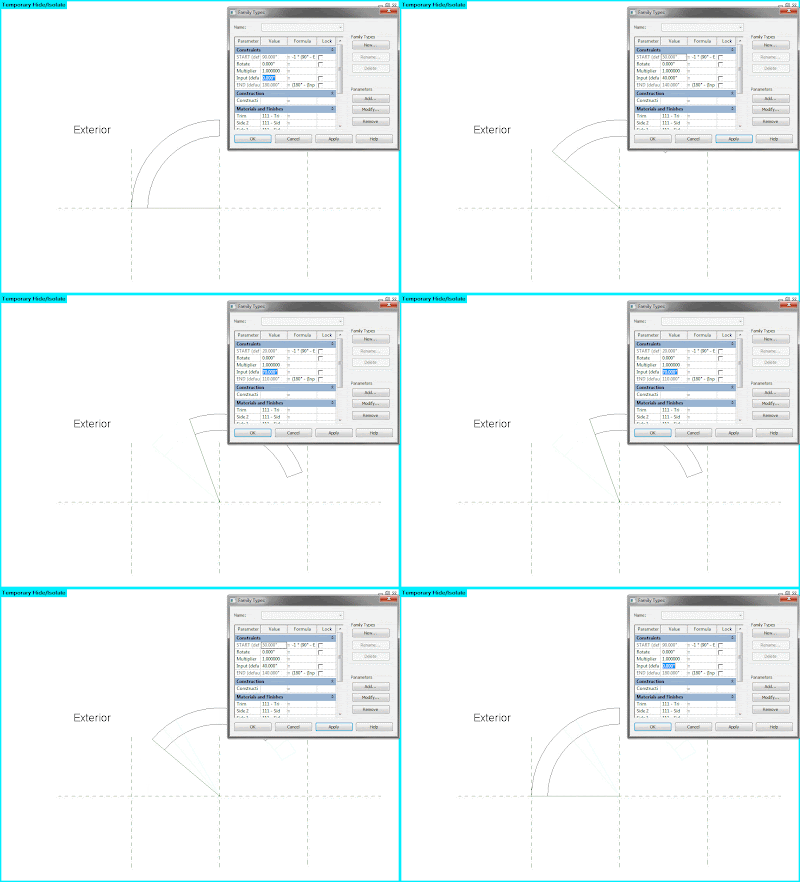
Now if we adjust the input value the work plane rotates around the center point
Next, we return to the exterior view and apply reporting parameters to the existing reference planes
We can now set our workplane to the reference line and create our extrusion and use the reporting parameters to control the extrusion
The panel is now ready to be loaded into a curtain wall system and is controlled the same as I mentioned in my previous post
Thursday, July 12, 2012
Rotating Curtain Panel
I apologize for the lack of posts, I guess the days just got away from me.
Anyways this post is going to be a tutorial on how to create a rotating curtain panel system. Now, there may be more efficient ways of doing this, this is just the method that I came up with and it is really easy to create.
Start by creating a new "generic model face based" family and creating a simple square rig to control the Length and Width of the panel
| Curtain Panel Rig: Top |
| Curtain Panel Rig: Front |
Because the panel will be rotating it is important to have seperate materials on each side in order to easily differenciate the two sides. To accomplish use to extrusions instead of one and assign a different material to each extrusion. For my panel I went a little further and used a sweep around the exterior of the panel to create a basic trim.
| 3D Section of Curtain Panel |
Once your panel is finished be sure to flex the parameters to make sure it changes appropriately and save it somewhere you can find it later.
Step 2: Creating a pattern based system
Start by creating a new "curtain wall pattern based" family. Next we want to bisect two oppoisite sides of the rig with a point, so place a new point at the midpoint of each line and assign an equidistant dimension to each point. (You may want to make the reference planes always visible)
| Reference Point Properties: Show Reference Plane |
| Curtain System Rig |
Next host an additional point on top of the new points and move them upwards by assigning an offset parameter. Next connect all the points with a reference line (turn 3D snapping on) and host a new point on the midpoint of the connecting line of the vertical points and apply an equidistant parameter.
Next set your work plane to the newest created point and create two lines, one horizontal, and one at a slight angle (turn 3D snapping off) and assign an angle parameter to the two lines.
Now, Set your work plane to the angles line and load in your previous curtain panel model be sure to select the "Place on Work Plane" button and place the loaded component on the center of the point
| Set your work plane to this line |
| Place on Work Plane Button |
| Panel hosted on the point |
Now select your panel and edit its properties click the little square next to each of the parameters to create a new parameter in the system family (this links the parameters so you can adjust the parameters of the panel)
| Curtain Panel parameters |
Now is the tricky part, we want to be able to control the rotation each panel individually, while also being able to control the rotation of the entire system at once to animate the system, so we need to get a little creative with parameters.
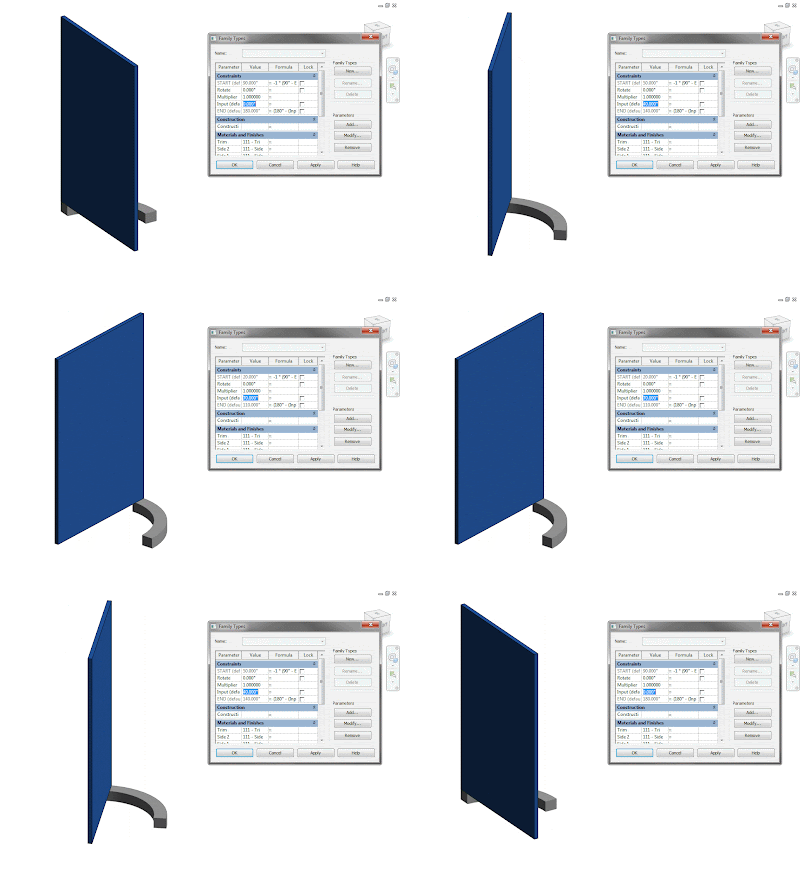
Start by setting your the angle parameter you created earlier to an instance parameter (I named this parameter "A"). Next create 2 new angle parameters and name them "Rotate" and "Input"(Instance) The "Rotate" parameter will be used to rotate the entire system, and the "Input" parameter will rotate the panels individually. Now create another new parameter this time choose integer and name it "Multiplier". This parameter will make it easy to adjust the steps of the rotation.
Now under Formula for the "A" parameter put "(Input * Multiplier) + Rotate)
| System Parameters |
Now that the parameters are set its time to finish the model for a little extra detail I extruded a sweep to create a frame, however this is'nt really necessary
Step 3: Test your system
Start by creating a new conceptual mass, create a box and divide the surface of one side. Edit the grid layout to "Fixed Distance", and specify the size of your panels (I used 6'). Now load in your system and edit the properties and adjust the size of your panel to match the size of the grid. You should get something like this:
| Note: My Input parameter was set to default at 0º |
Now this is where it gets tedious you must individually select each panel and adjust the input to create the pattern you want. To select a panel hover over it and press the "Tab" key. (You can hold control to select multiple panels to speed up the process). I would advise using 1º intervals for the input values of the panels (these can be adjusted by changing the multiplier parameter)
| Adjusting a single panel |
| Adjusting multiple panels |
The pattern I used for this example is having each column increase its "Input" value by 1º to create a wave form. Now as you can see the 1º interval isnt very exciting, but if you increase the multiplier it increases the interval.
| Pattern at 1º Intervals |
| Pattern at 5º Intervals |
| Pattern at 20º Intervals |
| Pattern at 10º Intervals |
To create an animated GIF set your pattern then export an image of the system, change the "Rotate" parameter by 10º and export the image again, do this 36 times to create a full loop (tedious I know) and create the GIF using these images.
| Example 1 |
| Example 2 |
| Example 3 |
I Apologize if this tutorial was hard to follow, the model was a lot easier to make than it was to write about, sometimes its hard putting concepts into words. Anyways, if you have any questions/comments feel free to leave them below, or shoot me an email and I can try to clarify, if many people have issues trying to understand I may just make a video, I think that will make it much easier to understand, I would also like to post my file as an example, but I am not sure of the easiest way to do that, so I will hold off for now.
Saturday, June 30, 2012
Sneak Peek: Rotating Curtain Panels
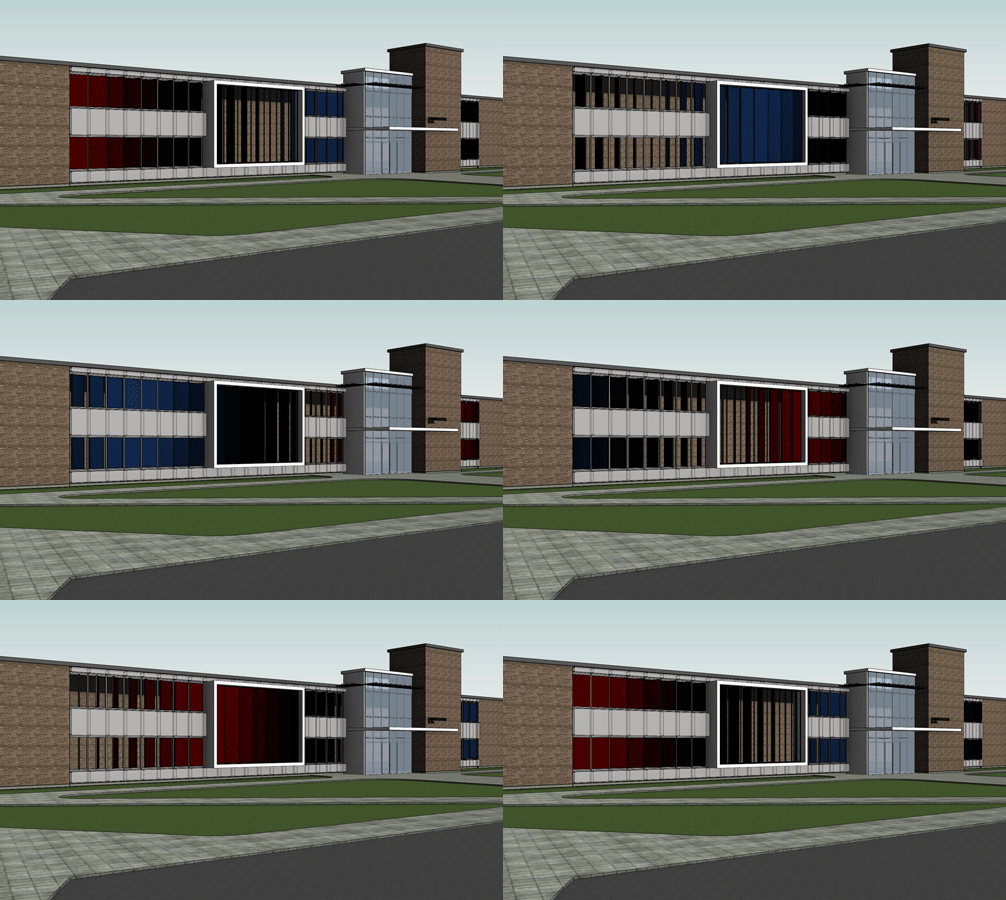
Here is a quick view of a pretty cool parametric curtain wall system I created. The system allows each panel to be adjusted independently to create a design, and then rotated all at once to create an animated effect. I plan on breaking down how it was created in a future post, but for now a few images to get a taste of what is to come.
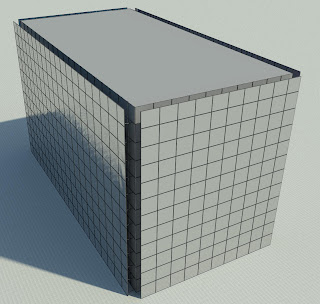 |
| Curtain Panels all set at 0º |
 |
| Curtain Panels all set at 45º |
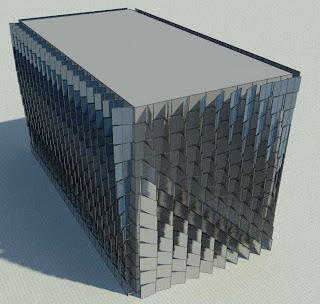 |
| Curtain Panels set at 10º intervals in different patterns |
 |
| Curtain Panels set at 20º intervals in different patterns |
Note: These GIFs were created by exporting each frame (adjusting the rotation) then animating in Photoshop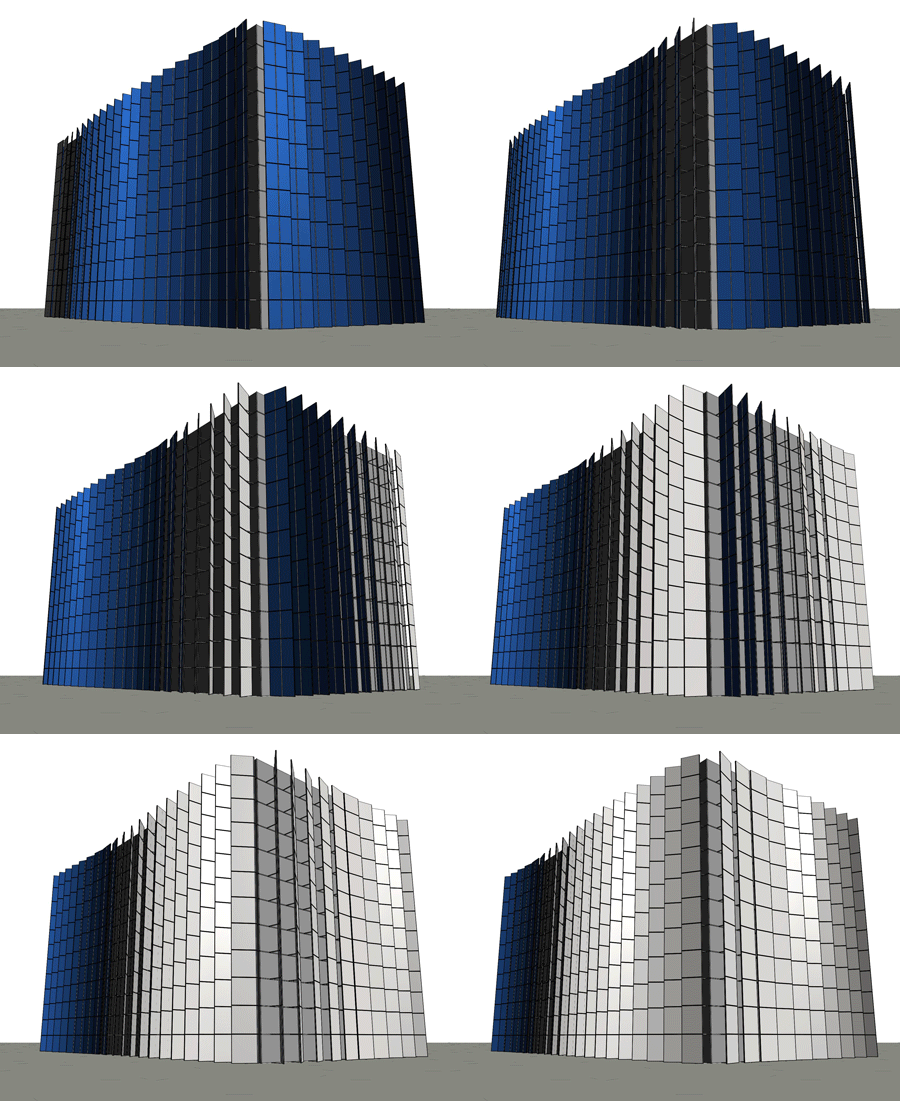 |
| 6' Panels 5º intervals vertical pattern |
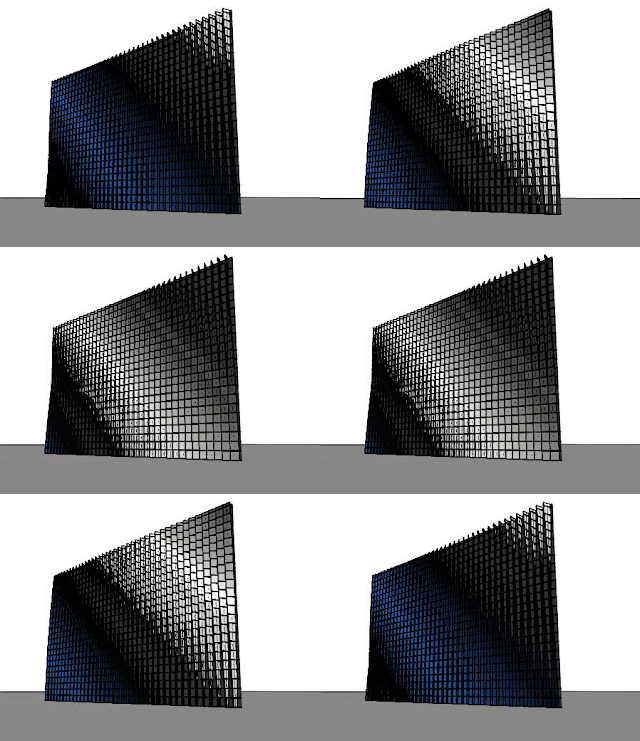 |
| 3' Panels 5º intervals diagonal pattern (low res.) |
 |
| Close up: 3' Panels 15º intervals diagonal pattern |
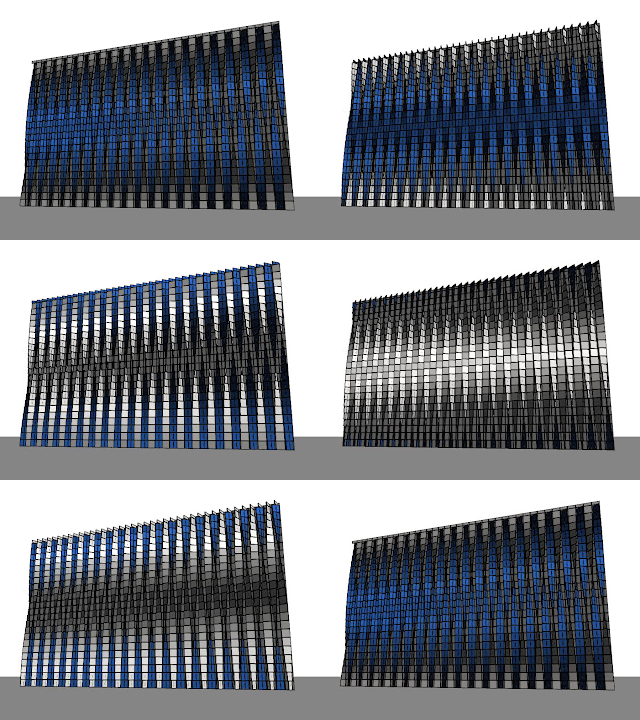 |
| 3' Panels 10º intervals alternating vertical pattern |
Subscribe to:
Posts (Atom)
